Showing posts with label Competition Tips. Show all posts

Saturday, June 5, 2010

When Things Go Bad - Part 2

“Climb if you will, but remember that courage and strength are nought without prudence, and that a momentary negligence may destroy the happiness of a lifetime. Do nothing in haste; look well to each step; and from the beginning think what may be the end”.
(E. Whymper, 1865)

In my last post I emphasized the importance of 'pre-thinking' about your reactions to abnormal and emergency situations. I continue that theme in this post. Again, these are all situations that are avoidable. Do your best to use good judgement to avoid the necessity to employ these procedures.
SCENARIO 4 - Off-field landing
Due to circumstances, (blown back, climbed into a position where you can’t make the ‘normal’ LZ, malfunction that requires a quick landing, etc.) you are going to land in a LZ that is not familiar to you. Congrats! You just went XC!
Your decision to choose an LZ should be made at an altitude that allows time to assess the LZ and plan your approach. When you are making your first few out-landings, please give yourself lots of margin. Plan your approach while fairly high. Use large fields. Long and runway shaped (into the wind) is preferable to short and square. Plan to make a pattern similar to the one you are used to. Once your decision to land out has been made, choose the best field you can safely reach using the following criteria:

• Wind direction – Pick a field that allows a landing into the wind.
• Obstructions and crops – Consider rotors downwind of obstructions. Also choose a field without nasty vegetation and expensive crops. If you must land in crops, attempt to minimize the damage you cause by landing near the edge of the field, or on a road within it.
• Slope – This is secondary to wind direction since it is possible to side-hill land or even land uphill. Landing downhill can be problematic and create an ‘overshoot,’ so pick as level and large a field as possible.
• Wires – Assume the field has wires in it and around it. Look for structures adjacent to the field and look for wires to the structure. Also consider fences when evaluating the field. Barbed-wire fences tend to attract wings after a safe landing.
• Livestock – Ideally, you want to choose a field without any animals in it. Failing that, land as far away from the livestock as possible. Horses are particularly skittish so talk to them as you make your approach and make an attempt to avoid over-flying them.
• Extraction considerations – Look for alternative fields if, for example, you notice a river without bridges between you and the road.

While you are looking over your options, consider a secondary field that you may opt for if your primary choice proves, later, to be unsatisfactory due to wires, crops or other factors.

All factors, short of getting yourself down safely, are of little importance. Land safely and then deal with extraction problems, negotiating with angry land owners etc
.
If you discover on short final, that your field has wires across your path, you must react quickly to avoid hitting the wires. If the electricity doesn’t kill you, the fall will certainly hurt. Consider these alternatives. Land X-wind or downwind to avoid the wires. B-line stall to increase your descent angle into the remaining space prior to the wires. Pick the softest looking trees, bushes, etc. rather than fly into wires. If necessary, consider your gear as expendable. It is better to shred your wing or harness than to wreck your body trying to save your gear.

Landing ‘off-field’ should become something that is not intimidating at all. I consider it to be a valuable skill that needs to be practiced by everyone. Consult your instructor for the first few, though.
SCENARIO 5 - Knot in your Lines
You launch and soon notice a tendency of the wing to turn to the right. Counter steering and wt. shift are sufficient to fly straight, but you have some serious controllability issues.
First, fly away from the hill to provide ground clearance and time to resolve the issue. Use minimum brake inputs since you may be very close to the stall point. Next, remind yourself (by looking and touching) the location of your reserve handle – If you need to toss your reserve this quick review will serve to minimize your response time. Consider flying over an area that is ‘friendly’ to coming down under your rescue canopy. Also consider that your glide ratio may be degraded by the drag created by the deformation of the wing.   Head directly for your LZ while you assess and try to remedy your situation.
.
Now let’s assess the situation. Look at your wing and notice any obvious dimpling of the lower surface. Look for lines that are snagged. Look at your risers to see it the carabiners and speed system are all normal. Use the eyes of your mates to indicate any noticeable defects from above.

You probably have a knot in your suspension lines. Often you can clear a knot by carefully pulling the affected lines and letting them (‘twang”) loose. It may take a few tries – but be cautious, you may cause the wing to spin if you are pulling enthusiastically on one side. Another possibility is that your speed system is hung up on one side. This should be evident by looking at the risers. You might try to activate your speed system (gingerly) to see if that clears the problem.  Another possibility is that your brake line has fouled.  It isn't uncommon to launch with the brakes wrapped in the 'D' lines and this can cause a restriction of the brakes at the pulley.  If controllability to a safe landing is in doubt, consider using your hook-knife to cut the offending brake-line, speed-bar line or rear suspension line.   If clearing the cause of the asymmetry is unsuccessful, then I recommend landing in the largest LZ available. Make your approach as conservative as possible and consider that your controllability may change when slowing for touchdown – even stalling much earlier than normal. Consider landing in a large field without a flare.

An advanced ‘last resort’ technique, which one should only attempt if controllability is really in doubt, and you have a healthy clearance from the surface, is to execute a full stall to release tension on the lines and then pull them tight. If the knot doesn’t come out, the result may be an abnormal recovery/cascade event that will result in a reserve toss.
SCENARIO 6 - Tree Landing
Due to a gross miscalculation, you are going to land in the trees.
Plan your approach so that you impact near the central trunk of the tree. Ideally you should impact with the tree with your legs crossed at the ankles and slowed with a full flare 4-10 feet above the tree branches. Once the noise stops and you complete your string of expletives, assess your situation.

If you are hanging above the forest floor, get secured to the tree. Grab a good branch, then tie on to it as quickly as possible using whatever is available. If there is a possibility of your wing being re-inflated by wind, then do what’s necessary to secure it. I recommend carrying a tree kit (which is accessible while strapped into your harness). It will contain enough webbing to attach your harness to the tree. If you are secure, you might consider waiting for rescue as the safest course of action. If you decide to exit the tree, be sure that you have sufficient equipment to go all the way to the ground - if not, stay put. Some recommend using the reserve parachute lines and bridle to climb down from the tree – I wouldn’t recommend using this method higher than you care to fall.

You can decide your options based upon the gear you have accessible, your situation in the tree, and the distance to the surface. Options to consider are: rappelling from the tree (anchor) while in your harness; rappelling from the harness (anchor) using a separate climbing harness or diaper harness; or even climbing down the tree.

HERE is a great article that explains the hazards and methods of extracting yourself from a tree.
At the very least, have a spool of dental floss in your pocket to lower to the rescue crew. It can be used to pull up a climbing rope.

I highly recommend practicing with your tree kit under controlled conditions. It is trickier than it looks to rappel from the tree and rig the harness for rappel.
SCENARIO 7 - Water Landing
Due to a gross miscalculation, you are going to land in the water.
Just as is a ditching in my airliner, this is a nightmare scenario. The following applies to any water landing, but is particularly true in any type of surf. Your chances of death, when landing in the midst of 30sq. meters of sail and 300+meters of spectra lines, is quite high. You should do everything in your power to avoid a water landing - almost any other scenario is preferable to landing in surf.  This includes crashing in an unsavory place and risking injury. Bear in mind that I am a strong swimmer and this scenario is still VERY intimidating because the gear you are wearing; helmet, boots, multi-layers of clothing - all soak up many pounds of water and will effectively exhaust and drown you. . .

That said, you can do a few things to improve your chances of survival:
  • Carry a hook knife and keep it readily accessible.
  • Once it is obvious that you will be landing in the water, plan your approach so you will hit close to the shore in a (preferred) downwind direction. 
  •  By flying downwind, you are assured that the wing will overfly you and not come down on top of you.  
  • Prior to landing, at an altitude of about 50’, you should remove the brake loops from your wrists, disconnect your leg straps and chest strap, and remove any cockpit attachments (if you think they will hinder your evacuation of the harness). 
  • Plan to fly into the water with no flare, to allow the wing to overfly you. Simultaneously rock forward out of the harness, dive down and escape laterally (towards shore) so as to avoid any lines.
  • Rid yourself of clothing and footwear as soon as you are clear of your lines - You are going to be exhausted in an amazingly short time. 
  • Forget about saving your gear until your safety is assured and you have help. It is amazing how heavy a wing full of water is. If you don’t believe these cautions, watch the video below.


More scenarios at When Things Go Bad Part 3 -
Fly Safe out there.
Tim

Thursday, June 3, 2010

When Things Go Bad - Part 1

What to do when things go bad

This is Part ONE of THREE in this series - Links to the next part are at the end of this page.
I’ve spent much of my life in simulators; often practicing “worst case scenarios.”  While practicing the handling of these types of situations, I work with my crew to utilize the procedures that have been practiced and designed to ensure the proper response.   We also discuss alternative courses of action.  It’s not pessimism that drives this behavior – it’s a healthy respect for the value of mental preparation.   I believe that a similar mindset is valuable in our flying of paragliders.

Even if you never leave your home site, and never land anywhere but your own LZ, “dry flying”  - thinking abnormal scenarios through, can be good practice.

All of the scenarios in this post are situations that are best avoided in the first place.  Use proper preparation and judgment, and you will eliminate the need to deal with these situations.  It is still of value, however, to consider what you would do, to avoid panic and brain-lock, should you encounter them.

Rule number one is KEEP YOUR HEAD.  Don’t stop thinking just because you are confronted with an abnormal situation.  There is a way to handle the situation to minimize your peril and maximize a positive outcome.  Rule number two is TAKE YOUR TIME.  Often the time for ‘immediate action’ has passed – Now you need to make a considered reaction to ensure a safe outcome.

SCENARIO 1 – Parked.
You are soaring at 100 meters (300’) over launch, along your ridge site when the wind picks up suddenly.  You realize you are parked and unable to penetrate into the wind.  What to do?
Assuming that your normal LZ is upwind and below launch, your first course should be to increase your speed to penetrate into the wind.  Use of your speedbar will achieve added ground speed.  If the air is rough, you may not be able to use your speedbar to its full extension, but use as much as you safely can to achieve a visible groundspeed into the wind.  As you get in front of the ridge you will often leave the lift band that can increase the velocity of the wind as it is compressed over the ridge.  You will soon note an increase in your groundspeed.

If you are still parked while accelerated, or unable to use speedbar due to rough air, then you need to explore your other, less attractive options.  You might want to consider descending to the level of the slope in front of launch and side-hill landing.  You may need to land using big-ears to pull this off.  It is often possible (since the wind may be slightly less than 90°  to the ridge) to creep along, parallel to the ridge, so as to get to the end of the ridge and get to an alternative LZ next to the ridge and/or downwind of the ridge.

It also may be a viable alternative to fly over the back to land downwind of the ridge.  You must take into consideration that there may be sink and rotor caused by the wind flowing over the ridge.  You can increase the viability of this choice by utilizing lift on the ridge to get high and choosing your spot to go back carefully, to maximize the distance from the ridge of your landing.  Generally landing as far downwind as possible is your best bet.  Why not take the next thermal over the back and embark on a cross-country flight?  This is a far better choice than panicking and rushing the reaction, or attempting to get to your normal LZ in a vain attempt against the wind. 

You get the idea?  We need to consider these options so they come to mind when you realize you’re in a pickle.

SCENARIO 2 –  High Wind Landing
You have had a great flight and are landing in a stronger wind than expected or comfortable.  
First, plan to land in a LZ with sufficient room to allow for downwind drift, should it be encountered.  Next, plan to land in the upwind 1/3 of the LZ if this has clear air.  When dealing with a lot of wind near the ground, consider any obstructions that may create rotor turbulence.  Make an approach to the LZ that allows you to maneuver without turning away (downwind) from the LZ.  Your approach should be made with the minimum necessary speedbar.  If speedbar is used, then plan to touchdown with minimal bar and then kill the wing by pulling down on your “B” or “C” risers.  An optimum way to achieve a nice high-wind landing is to lean forward slightly, with legs extended and risers ready to pull, so a PLF may be achieved or a quick turn may be made while pulling the “C” risers to kill all lift.   A video of such a landing can be viewed below.  I opted to make the approach and landing without speed-bar since none was necessary.  If speed had been required, I would have landed on the beach since it afforded a bit more space. 

An alternative procedure that I have not employed, but I’ve heard can be successful, is to twist 180° and land while facing backwards so any downwind drift may be handled by running backwards while killing the wing.

SCENARIO 3 – Cloud Suck
You are thermalling up in a nice thermal, when suddenly you realize that you are in rapidly increasing lift and may be sucked into the cloud above, soon. 
As the thermal rises, and the air reaches its dew-point, the increased energy of the thermal can reach a point that causes a climb much faster than intended and anticipated.  Prior to being lifted into the cloud you should attempt to exit the area of lift.  The best way to do this is to roll-out and fly in the direction of the closest edge of the cloud (and the adjacent clear area).  You should have noted the nearest clear area while well below cloud-base since you will not be able to see which direction is best while close to the cloud.  If necessary, use speed-bar and big-ears to increase your speed and sink rate, to evade the lift.  If you have a compass or GPS, use them to provide heading information.  If not, then use the sun as a reference and hold your heading relative to the sun, if possible.  It may be best to hold this heading even if you are lifted into cloud since horizontal escape of the lift is the best method.

Alternative methods are to use descent techniques prior to reaching the cloud.  Big-Ears + Speed-bar, Spirals, and B-Line Stalls are often employed to decrease the effect of the lift.  When exiting these configurations however, you may find yourself climbing in the lift again.  That is why I recommend the first technique.
   
If you find yourself in cloud, do not panic.  It is disorienting and vertigo may be experienced, but you are not in trouble unless you just flew into a 35,000’ thunderstorm.  Just remember that a paraglider has more inherent stability than most flying machines so a hands off approach will suffice to allow you to exit the cloud.  If you can safely fly with some speed-bar, then I recommend you use it to expedite your exit from the cloud.  Be patient – when you get into the sink, you will soon exit the cloud.

A note about spirals - Spirals are a very effective descent technique, but need to be practiced.  I recommend you get with your instructor, or better yet, an SIV coach, to practice ‘throttling’ your spirals so you can effectively modulate the G forces and descent rate.

Part 2 is located HERE.  If you have any suggestions, drop me a note.
Tim

Friday, May 28, 2010

Over the Back at Cuesta

Today was one of the best looking days in San Luis Obispo Co. for XC in a long time.  Patrick pinged me early and we decided it would be an early day so we met at 10AM at launch.  Cumulus clouds were popping in all quadrants and the cycles were causing regular gusts up the face.

We hurriedly set up our gear and were ready to launch by 10:30.  My goal was to take advantage of the Westerly flow and make a downwind dash to Mike's place (about 20 miles East) and then reassess and continue to reach  I-5, if possible.  I had not made the crossing to the range East of Santa Margarita, so this would be fun and new.

I launched first and scratched a bit, before contacting a ripper that took me right to cloudbase at 5000'. Patrick was working up also so I headed over the back to the East side of 101, where I expected to catch another thermal under the building clouds. All I found was trashy sink and soon found myself landing at the small airport near town. Patrick came over & also dirted after only a few miles. Jack was kind enough to drive over and pick us up so we could give it another go.

The wind had come up quite a bit in the interim, so neither Patrick nor I were planning to go XC the second time, but when Jack called to say he'd decided not to launch in the freshening wind, and would drive retrieve, I was ready to head over. This time the cloudbase at launch was over 5300' and when I got the second climb in trashy air in the lee of the East ridge, it was 6-700'/min. to 5800' cloud base.  Unfortunately, as I headed East at over 40 mph groundspeed (that's bookin' for my PG) it became apparent that the ground was shaded and the wind, that was adding to our groundspeed, was also breaking up the lift. The landing options are so much better than I had expected while driving through the area and the route is not as intimidating as I had previously thought. I expect to go this way with more success in the future.  It was a fun flight for a short 13 miler, but it really got Patrick and I thinking about the possibilities of the route.

I landed in brisk wind just off of Parkhill rd. (like Patrick, I thought it might be 58)   It was a short 13 mile flight but lots of fun for Patrick & me.  One more thermal and Mike's place was easily possible, two more and we'd have been smoking to Bfield ;-)

I snagged a ride, with a nice local guy named Scott, for the 5 miles to Hwy 58 and we picked Patrick up on the way.  Jack soon picked us up on the Hwy.  Thanks for the time behind the wheel Jack - we really appreciated it.

My flight can be viewed here http://www.paraglidingforum.com/leonardo/flight/332527

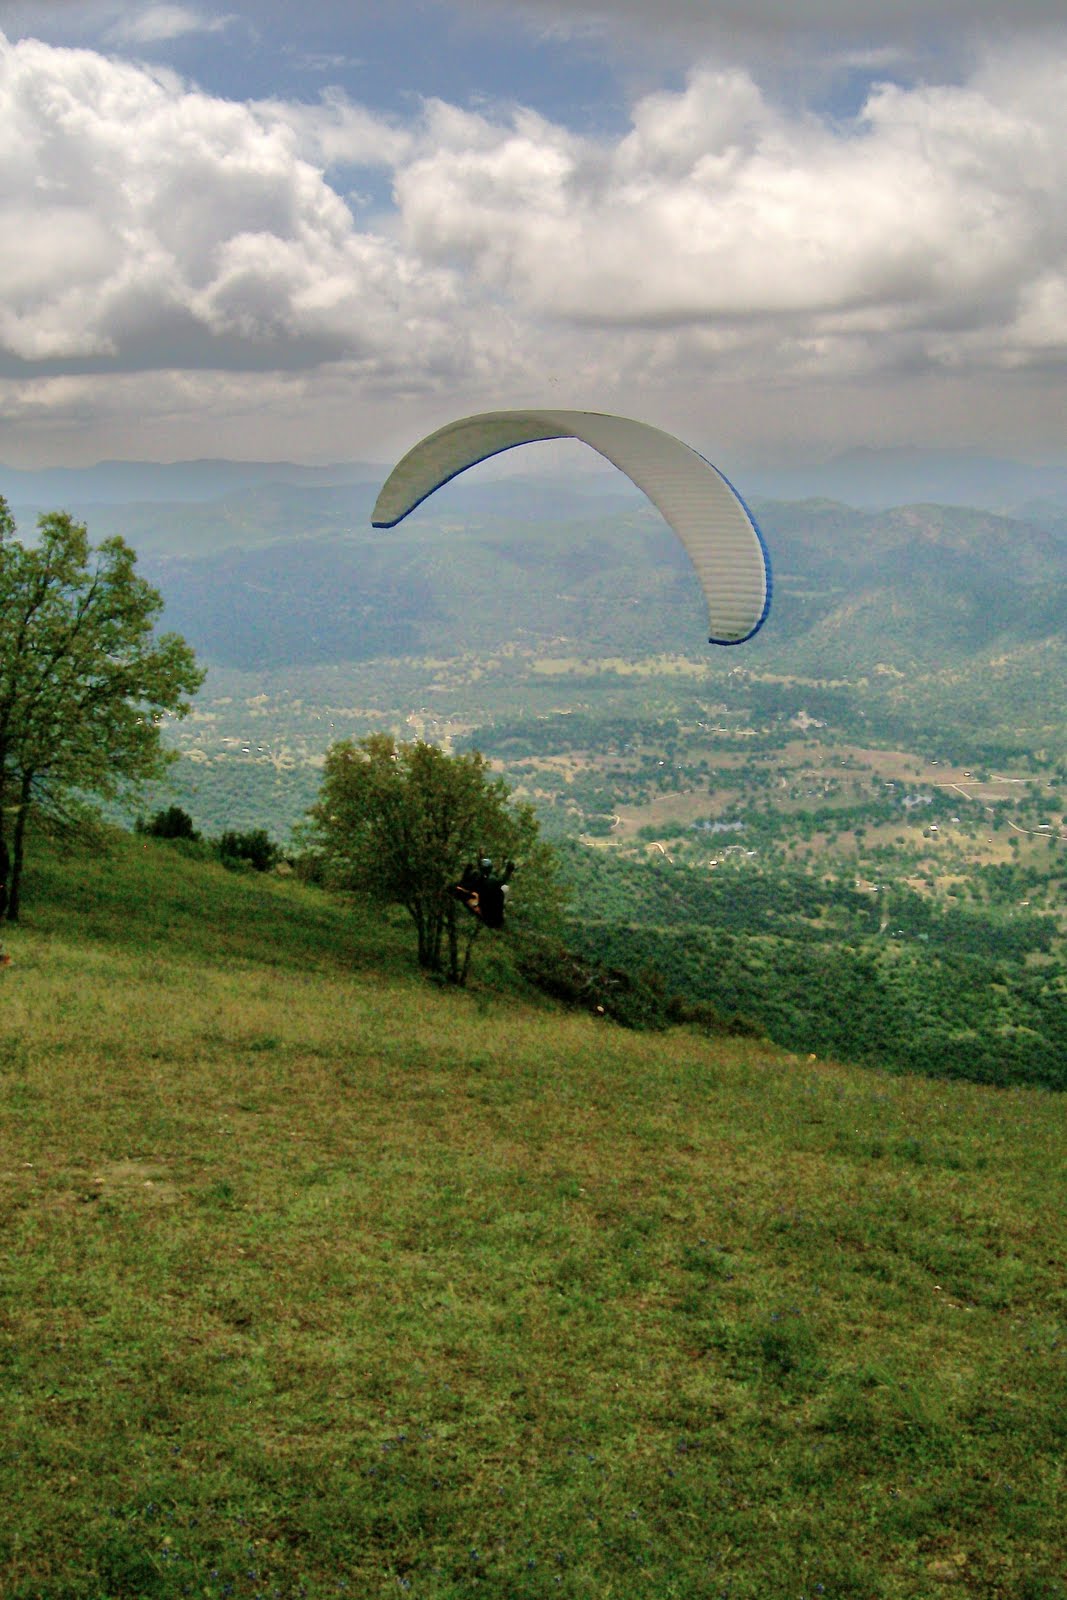
Me on the Avax XC2 flying with John H. Photo by Patrick Eaves

Tuesday, May 25, 2010

BAPA Comp at Dunlap May '10

Dave S. and I headed to Dunlap on Wed. afternoon with the intent to fly 3 days and then participate in the SFBAPA league events over the weekend.  When we arrived at launch the conditions looked perfect for a nice 'shake-out" flight around the valley.  We camped at Dan's LZ and enjoyed a nice dinner up the road at the pub.
Thursday Jug Arrived and we had another fun flight around the valley under great cumulus clouds.  The top-of-climb was low but it was still possible to move around the valley.


Friday was more of the same and I made the decision that I would be flying my Avax XC2 in the weekend comp.  I've decided to fly Serial class in the coming season and have ordered a new Gradient Avax XC3.  The Boomerang 5 is a great wing and I've enjoyed flying it for about 30 hours.  It never did anything squirrelly to me and has great glide performance.  I just didn't connect with the wing.  I didn't trust it and felt that I could actually score better on my XC2 or new XC3.  Maybe I'm not ready for a comp wing yet - I'm OK with that.  I'm firmly of the opinion that we all fly better on wings we are confident in and flying well.  I do know that I can't compete, in the open class, with the latest 2-line wings on a two-year-old Boom 5 so I might as well fly the wings I enjoy flying and that are at the top-end of their class.  


Saturday the troops all assembled at Dan's at 9:30 and we headed up the hill at 10:30.  The conditions were forecast to be good with lift to 6-7000' and a NW wind in the valley.  A task was called from launch to hill 49917 and back, then over Big Cat - and Bald, then a leg to Orosi in the flats for a total of 25 miles.


I had a good high start and barred it all the way to Hill 49917 the lift there was sporadic, but I soon found a thermal pulsing off the hill.  I climbed high enough to get back to launch and caught some lift with the lead gaggle.  We all headed down to Big Cat and then hit the 4km cylinder around Bald Mtn.


A few wings turned directly to Ruth Hill and were struggling low in the shade, so I was looking for alternatives.  To my right (the wrong way to Orosi) was in sunlight and I thought about heading there to poach a bubble off the low hills.  At that same moment, I noticed Josh coming across low to the same area.  He began to circle low in weak lift and I came in on top of him.  The lift was weak but soon bloomed and we climbed together to over 6000' which made it possible to pick our way past the shade at Ruth Hill  and start a relatively straight forward flight to Orosi.  The clouds were working well and lift was often 500-600'/min.  Josh pulled ahead when it was obvious that the flight was going to be easy and beat me to goal by 3 minutes.  Fredric and Steve made it to goal about 30 minutes later and Hoop made a great effort, landing 1km from goal.
Lesson reaffirmed: Don't follow others into conditions that are obviously NOT working.  Look for viable options and try to capitalize on the opportunities they present.
Sunday's task was started in conditions that included low cloudbase and some forecasts of convective activity.  We built a 19 mile task that would put more pilots in goal and keep them in the Dunlap Valley.   After looking over the conditions I decided to launch early to sample the lift and make sure that the convection was reasonable.  Climbs were plentiful and the lift didn't increase in intensity as the cloudbase was approached.   As the start time approached conditions felt better and as we made a glide into Hill 49917 the trend was obviously better.  At that point I just concentrated on the race since I was in the hunt with Josh, Eric, and Fredric.   By the third turnpoint I was in 4th place and the flying was fast.  Josh had stopped to take a climb after Big Cat, on the way to Airstrip, while Eric and Fredric continued into Granny's Knob low.  It looked like they had gotten stuck on the knob, so I took the next 400'/min climb and topped out at around 5500'.  This gave me sufficient height to overfly the guys while they wrestled with sporadic lift, low over the knob.  I was fortunate to pick a great line that actually provided lift as I tagged and returned from the Airstrip.   All I needed for the last 7 miles of the task was one more climb, which I took just short of Big Cat.  I knew Josh was on final glide and Eric was hustling to catch me, but I took the climb at least 1000' too high and had way too much altitude for the final glide.  A rookie mistake, but I still placed second for the day - 4 minutes behind Josh.


I feel very good about the weekend for two reasons.  Firstly; My indecision regarding how I was going to compete this season (and in future seasons)  was resolved, as I sold my Boom 5 on Friday and ordered a new Gradient Avax XC3 on Thursday.  I'm flying serial class for the foreseeable future.

Second; I left the Boom in the bag and flew my three-yr-old Avax XC2 well this weekend and placed 2nd to Josh in both tasks.  I really feel like some of the effort I've put into studying the game is paying off.  

The league has really flourished due to Jug's efforts.  Introducing the Mentoring program and reevaluating the goals of the league to promote the participation and education of newer pilots has revitalized the league.  It's going to be a great season.

Results are HERE.  
and more photos can be viewed HERE

Tim

Saturday, April 24, 2010

Flying in Paraglider Competitions - A Primer, Part 6

This is the sixth installment in the series,
"Flying Paragliding Competitions - A Primer"
Please send me any comments and/or requests for info
 that you would like to see included.
Part one may be read HERE

The complete article may be downloaded,
in
PDF format HERE

Variations
Some competitions utilize variations of the formats mentioned so far.  I’ll mention a few here so that they are not a complete surprise when they are utilized.  If any of these options are exercised you can expect some explanation from the CD to answer questions at the Pilot Meeting.

Alternate Tasks – Occasionally, when weather conditions are in transition, the Task Committee will build an “A” task and a “B” task.  Each task fits weather conditions that may develop.  The Task Committee will call the appropriate task at a later pilot meeting when the weather forecast is more developed.  A good strategy is to write down each task with all details, then program both into your GPS.  When the task is called, you can make the appropriate route a competition route, and/or activate that route.

Multiple Start Gates – When the Task Committee considers it necessary, a start with multiple start times, or gates, will be specified.  A “first” gate at 1 PM may be specified with 15 minute intervals between gates, and the last start at 2:15 – for example.  What this means to you is that you can choose to start the task any time after 1 PM.  Your elapsed time for the task will be computed from the time of the last start gate time that expired prior to you leaving the start cylinder.  This format can provide some strategic opportunities including: Choosing the gaggle you’d like to fly with; Flying out on course, and then returning for a later start gate (if conditions become stronger for example) etc.

Ground Starts – At large launch sites this option can be used and is quite a sight.  At the “start” time all participants launch and begin the task.  Elapsed time begins at the start-time.  These are generally not seen in the USA.

Open Distance – The XC Open series uses this format.  Instead of a task committee setting your waypoints and goal, you choose the turn-points.  There is no goal other than the horizon.  Flying these tasks can be less stressful, but also has less ‘mano-a-mano’ feel.

Class Racing – Most competitions have an “OPEN” class and a “SERIAL” class.  Some also include a “SPORT” class.  Serial Class includes EN-D wings and Sport Class includes EN-C, B, or A.   Usually all pilots, in all classes, will fly the same task.  Scoring is not handicapped or given premium based on class.

Handicapped Racing – Some competitions use a handicapped score to allow pilots of low experience and flying low performance wings to score a ‘value plus’ score.  This type of scoring is sometimes used in Open Distance type of tasks and is useful in Team scoring.


Additional Equipment
Other than the equipment mentioned previously, I carry the following:

SPOT – The SPOT unit is a valuable piece of kit when flying XC.  Unlike cell-phones, it uses satellite phone technology to make a graduated request for aid.  I think it is cheap insurance.
 www.findmespot.com

Tree Kit -  I carry a home-made kit similar to the kit in this article from www.towmeup.com.


Survival Kit – I carry a kit with the items listed in my article.


Water – I carry a 2 liter water bladder in my harness and 1 or 2 additional liters in my pack.


Condom Catheter - Believe it or not, this is an important item.  I am able to drink freely and allow proper hydration while flying a long task.  Once you’ve used the CC, you will be a believer also. Girls, I’ve heard some use adult diapers, but I have no first hand info -


Oxygen – Many competitions are held in mountain sites where it is not uncommon to get over 15,000’.  A pilot’s performance is noticeably affected when at high altitude for any length of time.  Oxygen also helps the pilot stay warm when properly oxygenated.

4. Putting it All Together
Your task is to tie this all together.  The difference between Cross Country flying and flying Cross Country Tasks is similar to the difference between waterskiing around the lake for fun and skiing a slalom course at a prescribed speed.  Flying an XC task requires specific skills, preparation, planning, and strategy.  The best way to build the skills and learn the strategies required to fly in comps, is to fly comps.  It is a specialized skill-set that, when you achieve a level of competence, leads to understanding and competence that carries over into your non-comp flying.


Safety
The trickiest time, in your XC competition ‘career,’ will be your first 3-4 competitions.  Your experience is lacking, while your enthusiasm and competitive drive are high.  Many pilots are of the opinion that flying comps is dangerous.  I disagree.  Flying beyond your experience is dangerous.  Flying wings that you are unable to fly competently is foolhardy.  Competition pilots are some of the most experienced and safety-minded pilots you will meet.  Make a concerted effort to be a safe and mature competitor, and your longevity will guarantee you a degree of success.  You can begin by choosing to fly a wing that you are comfortable on.  Get experience flying in thermal conditions and launching in variable winds.  Practice your wing control so you are comfortable on launch.  Each landing should be planned and controlled.  When LZs are scarce, don’t “put yourself in a corner” where there are no good options.  In short – Use your head.  Remember that this is not your livelihood. It is simply, an ‘optional’ activity.


Expectations
When you begin to fly XC comps your primary goal should be to fly each task as safely and successfully as possible.  Don’t try to race.  Make every attempt to fly with a gaggle to cover the miles and make it to goal.  Making goal equates to success.  When you land short of goal you should try to learn from the experience.  How did others get through that area?  Could you have increased your chances?  I’ve found that writing up a debrief of each flight has future value when reviewing flights.   Expectations to learn are good since, even if you land short of goal, you will have valuable lessons to learn.


Strategy
Be a student of the game. You will soon understand that a paraglider competition task is like a road-bike race where cooperation and courtesy are important to your success.  The real race doesn’t begin until that last thermal when everyone in the lead gaggle is computing their glide to goal.  The pilot with the fastest wing, with the best glide, and the most accurate final glide computation (not to mention largest cojones), wins.  Your strategy is different.  Your goal is to fly with a gaggle of similar performance pilots and wings to work your way around the course to goal.  As your skill improves you will find that the company you keep will be of better quality.


Camaraderie
There are many learning opportunities during the competitions.  If Mentoring is offered, take the time to ask questions and discuss mistakes with your Mentor.  Take the opportunity to talk with the successful pilots when it presents itself.  Be sensitive to timing and don’t be a distraction when the pilots are setting up for a task.  Beer seems to be a good trade for expertise.  Some pilots are more conversational than others, but we all know that new pilots have questions and we are happy to work with them.

Success
Each of us has our own goals.  This sport has so many layers of challenge that ‘mastering’ XC competitions is quite a lofty goal.  Even pilots who have flown competitively for decades have bad days and make the occasional mistake.  The trick is to make less mistakes than you did last flight, each time you fly.  When you have your gear set-up correctly, when you know how to use your electronics to your best advantage, and when your flying skills and strategy are optimum for the day, you will fly a ‘good task’ to goal – the feeling of accomplishment is very rewarding.  Your rank is a secondary measurement to that of the joy you feel.  Hang-on, because NOW you are hooked.

Tim

Monday, April 12, 2010

Flying in Paraglider Competitions - A Primer, Part 5


4.   Flying the Task

This is the fifth installment in the series,
"Flying Paragliding Competitions - A Primer"
Please send me any comments and/or requests for info
 that you would like to see included.
Part one may be read HERE

The scope of this article is that of supplying information for use by new pilots in competition flying.  For that reason, I will discuss flying tasks as a new pilot on a lower/mid performance wing.  The strategies one uses when beginning are different than when the pilot has the skills and wing performance to stay in contact with the lead gaggle.   For now, your goal is to make as few mistakes as possible during the task. 

Philosophy and Strategy

You are here, not to win the competition, but to Learn and have Fun. You can maximize your learning opportunities, score, and your fun, by make it to goal.  I caution you to not let your competitive juices get the better of you.  While getting carried away in a weekend soccer game can leave you sore and bruised, making decisions that put you in harm’s way during a PG event can have much more serious consequences.  Use your head so you may fly another day.   

It is a valid strategy, at this point in your flying, to be a follower and fly with the gaggles around the course.  Flying with friends increases your odds for making it along the course.  Racing along at your own pace, alone, is just about guaranteed to put you on the dirt, or in holes that slow your speed considerably.

Planning the Task

Once the task has been programmed into your GPS and you have a moment to look at your map, take a moment to plan your flight.  It’s a given that you will need some key climbs during the task.  You can depend on luck, others showing you the lift sources, or you do your own strategizing.  As an example, if the top-of-lift for the day is planned to be 2,500 meters, and the ‘lift-band’ is roughly 2000 meters deep (In other words, below 500 meters you would be in danger of bombing out due to lift being broken or weak below 500meters) then you will have transitions (at a glide ratio of 6:1) of no more than (2000 meters X 6) or 12 Kilometers.   To fly a 50 Km. task you will need at least 5 full climbs, or more partial climbs to make it to goal.  Plan these climbs by looking for lift sources, spaced accordingly along your route.  Keep in mind the forecast winds for the day.  You should also look for potential ‘crux points’ along the route so you can plan to attack this portion of the task with other pilots to increase your odds of completing the transition successfully.

When to Launch

I’ve already discussed launch organization a bit and you shouldn’t underestimate the importance of your decision regarding launch timing.  Generally, I recommend launching shortly after the wind techs have demonstrated that there is sufficient lift to stay in the air.  It works out well to launch 30 to 45 minutes before the start time.   If it is obvious that you will have traffic in the queue and/or the weather conditions are variable, you may want to be suited up and ready to launch early, so you can take advantage of any launchable window.  I’ve seen very experienced pilots loose a task before they even launched, by delaying their launch for one reason or another, only to have the wind turn and make the launch impossible or excruciatingly slow.  Remember that you will need to consider your rank in the ordered launch to decide whether to wait or use the open launch period.  If in doubt, get in the air at your earliest opportunity.

The Pre-Start

Once in the air, I do a quick inventory to make sure my instruments are all working properly, speed system is working correctly, water source is OK, and that the condom catheter is un-kinked.  Spend time exploring the immediate area around the start cylinder for lift triggers and note the wind direction and speed.  All this information is data that is useful in planning your start.  At this time you also want to get to the top of lift and stay there.  The best pilots have a knack of getting high and staying there, prior to the start.  10-15 minutes before the start you want to get serious about putting yourself in the optimum position for your start.  

The Start

Ideally your start should take place at the optimum edge of the start cylinder, just after the start time expires.   The optimum edge is determined primarily by the wind.  You want to place yourself upwind of the course line if possible.   As the Start-time approaches, you need to remember one very important thing – It is better to be late across the line than to cross early.  If you do cross the start cylinder early, or if there is ANY doubt, do a quick turn back and re-cross the line.  You will receive no points for the day if you blow the start and continue on course. 

The graphic shows an example of flying the optimum route to the first and second turnpoint after the start.   By flying the optimum (red) line you have effectively shortened the route and turned the cross wind into as much of a tailwind as possible.

By noting your groundspeed, as you approach the start cylinder, you can use the Start Planning Chart in the appendix to help you judge your time to cross. 

Back to the start for a moment:  If you find yourself low and/or out of position for the start, don’t get frustrated and desperate.  We’ve all had bad starts.  Take the time necessary to get up and make a reasonable start.  Remember that you are not ‘ahead’ if you are the lowest glider in the valley – you’re just LOW.  Take your time and don’t compound error.

Flying the Task

Once you are on course, you are flying with the intention of incrementally advancing along the route.  Don’t let the specter of the distance intimidate you.  Just keep on working your way from climb to climb.  On transitions you should spread out so that you and your gaggle-mates can cover a large search area for lift.  When you see someone turn, wait a bit and verify they are going up, before moving to them.  While you are looking at the task in short increments, it is also important to keep the “big picture” in mind also.  By that I mean that a good pilot is looking down the course, at wings preceding her, and also anticipating the conditions as they change with time. 

Pace is very important to successful execution of the flight.  Some stretches can be flown fast when the lift is strong and abundant.  Other transitions will require a deft touch and the use of every scrap of lift.  Sensing this change in pace is very important in longer tasks that fly through many micro-climates and into the later portions of the day.  One way to learn this pacing is to work with more experienced pilots.  When they slow down, you should do so also.

Don’t give up when things look bleak.  As long as you keep yourself in the air, you have a chance to get back up.  Don’t wait until you are desperately low before you begin to work every foot out of the available lift.   Remember that the bubble that is teasing you may turn into a fully developed thermal core in 100 meters.  Always work towards getting up.  Never go on a “Death-Glide” when you have the option of gliding to a lift source.  It can even make sense to back-track to a lift source, if the best odds for survival are located there.   

Getting to Goal
When you are a thermal or two from goal you should be looking at your final glide calculation.  The big-boys are going to work this out down to the millimeter and then play chicken with each other until one blinks & starts his final glide on full speed-bar.  You are going to be a bit more conservative and make it to goal with some altitude so you can bask in your glory before landing ;-)  Keep your distance to goal in mind, even prior to the last turnpoint, so you can have a good idea when to begin your final glide.  You should have a good idea of your L/D Over the Ground, when heading in the direction of goal, so you can come up with a number (altitude or L/D req’d to Goal) where is will be possible to begin your final glide.  Don’t get in a hurry and make up an optimistic number – I’ve landed 1K short of goal after a 3 hour flight – it’s not fun.  Give yourself a guaranteed final glide & relax as you head into goal – it feels marvelous! 

Most Goal Lines are a cylinder around a waypoint (like any other turnpoint) however many will have goal as a 400meter cylinder with a 1Km End of Speed Section (ESS).  What this means to you is that when you make goal, your speed will be the average speed between the start and the ESS point.  You can stop ‘racing’ at 1K – You DO, however, need to cross the 400m cylinder to get your full points (speed, leading, etc.) Don’t forget to proceed all the way to goal, and don’t race on bar if it looks doubtful that you will make it all the way to the 400m cylinder.   
Part 6 is HERE
More to come - 


Thursday, April 1, 2010

Flying in Paraglider Competitions - A Primer, Part 4

This is the fourth installment in the series,
"Flying Paragliding Competitions - A Primer"
Please send me any comments and/or requests for info
 that you would like to see included.
Part one may be read HERE

Large Competitions
The primary differences, between Large Competitions and those held regionally, are those of scale.  The flying venues are sites that can accommodate many pilots at launch, and any gathering of pilots will see over 100 in the room rather than the 20-30 at League events.  For this reason you will find more organization to the administrative side of larger comps.  At the top of the pyramid is the Competition Director (CD).  The CD has the responsibility to deal with any issues that come up during the competition.  To take some of the load off the CD, committees are formed with committee members chosen from the pilot group.  Usually the committees are the Task committee, Protest committee, and Safety committee.  Each of these committees consist of appointed pilots who have XC experience in the area and the respect of their fellow pilots.

The Task committee:  The goal of the Task committee is to use the day’s forecast to produce a task that is challenging, possible by a percentage of the field, and safe.

The Protest committee:  Fields protests regarding all issues regarding procedures, scoring, penalties, and misconduct.  Protests are relatively rare and not considered by the committee unless a timely, written protest is filed and a protest fee (determined prior to the first task) is paid.  The fee is only returned if the protest is ruled in favor of the protestor.

The Safety committee: Input from members of the Safety committee is considered by the CD in making decisions regarding launch safety, safety on course, and important decisions regarding flying the task vs. cancelling or stopping the task.

Don’t be intimidated by the size of the field or the quality of the pilots and their exotic wings.   The higher the quality of the field, the more learning opportunities there will be for you.

For you, the differences will be seen in the following instances:

  • The websites for larger comps are less oriented towards the ‘new’ pilot.  If you desire information about the flying venue, you will have to do the exploration using Google Earth or similar map program.
  • The waypoint files will be loaded into your GPS units at the competition briefing by the scorer.  It will also include your pilot number as a unique waypoint in the unit.  You can make the scorer’s job easier by clearing all routes and waypoints from your instruments prior to arrival at the scorer’s table.  If you have an ‘exotic’ GPS unit, I would recommend that you bring the cable for the unit with you, in case the scorer does not have a cable for your unit.  If it is new and exotic, you might send an email to the Competition Director asking if your instrument will be supported.  
  • It is essential that your NAME and PILOT NUMBER are visible on the flight instrument case.
  • The Competition Director will hold a mandatory Pilot Meeting the evening before the competition begins.  Bring your Instruments and notepad to this meeting.   You will be checked in and given some type of bag-tag or card with your pilot #.  It will also include phone #s for the competition staff and emergency contacts. 
  • Transportation to the launch site is usually provided and the cost is included in the entrance fee.
  • Retrieves are usually included in the entrance fee.
  • All of the caveats relating to “Good Form” still apply.
  • As a new guy though, try to find a helpful pilot with some experience to answer your questions.  In the US, a great first ‘BIG’ competition is the “Rat Race” put on by the Haley’s in Ruch, Oregon.  They have a well developed Mentor Program that is designed to help novice XC competition pilots participate safely.  
  • Usually a big comp. will have a Launch Window based upon your standing in the competition.  For example; The meet director may announce that Launch Opens at 12:30PM with Ranked Launch beginning at 1PM.  For you this means that you will have the opportunity to launch early, without restriction, until 1PM.  After 1PM your ranking in the comp will allow all pilots with a higher ranked score to pass you in the queue.  The possibility of being stuck in the queue is quite high for a low ranked pilot, after Ranked Launch begins.  
  • To ensure that the meet director knows who is flying, you are required to check in when ready to launch.  This safety precaution is imperative to guarantee that all pilots are accounted for at the end of the day.
  • It is absolutely essential that you check in at the end of your day to notify the Competition Director that you are down and safe.  Even if you bomb-out and end your day in the LZ, 20 minutes before the start of the race, you MUST check in and submit your track at the end of the day. There is always somebody who forgets this and causes grief for the CD - Don't be this guy.
  • Some competitions,  because the logistics allow for easy transport from the LZ to launch, will allow a “RELAUNCH”.  This option may have specific times and rules associated with it.  Have a plan if you are in danger of landing in the LZ.  Sometimes it is advantageous to land rather than miss the relaunch shuttle because you tried to pull off a low save in vain.

Wind Tech
Large Competitions often offer the option of serving as a ‘Wind Tech’ to pilots who are unsure whether they want to participate in the competition but would like to fly during the event.  If you are tempted to participate at that level, it is a good way to get a taste of the event.  There are certainly positive and negative aspects to flying as a Wind Tech, depending on your goals –

Positive Aspects of being a Wind Tech–

  • You are not required to enter the competition to act as a wind tech.  This saves you the cost of entry and is an option if you can only participate in a few days of the scheduled competition.
  • You will see the workings of the competition and how your fellow pilots prepare.
  • You will have the chance to fly with the competition pilots prior to the start of the task.  
  • Your flying will not have the perceived pressure of competition, but you will gain some experience just by attending and flying the event site.
  • You may have the option of flying on course (if allowed by the Competition Director)

Negative Aspects of being a Wind Tech –
  • You will not be scored and, generally, not allowed to fly the course. You are looking at the event from the outside in.  This may have you gleaning less experiential value than if you were to actually fly the competition.
  • Your flying is “at the pleasure” Competition Director. 
  • You will be told when to launch. It will be timed well before Launch Opens and timed so that the air can be sampled for start planning and safety considerations.
  • You may not qualify for a free retrieve. 

Good Form as a Wind Tech
Remember that your flying is allowed so you can be of service to the competition by demonstrating and reporting the type of day it is.  Both the competition pilots and Competition Director will be using your flight, and those of other Wind Techs, to gauge the wind, and the quality of the day.

Remember that a request by CD to launch is just that – a request.  YOU must determine the safety of your launch.  Consider the conditions and your experience when deciding to fly. I’ve seen wind techs launch in conditions that many of the comp pilots were uncomfortable with.  Safety is an acceptable reason to refuse a request to launch from the CD.

Remember that the participants all paid an entrance fee to fly in the event.  Fly in a way that is helpful and uncompetitive.  You should always consider the comp pilots when they are looking for seats in the van to launch, in your thermal, or jockeying for position for the start.  I’d say that 5 to 10  minutes before the start a wind tech should not hinder any other pilots.  Don’t expect to fly the task and don’t turn in your GPS for scoring.

More to come -

Part 5 is HERE

Tim

Saturday, March 27, 2010

Flying in Paraglider Competitions - A Primer, Part 3

This is the third installment in the series, 
"Flying Paragliding Competitions - A Primer" 
I've reposted to correct some formatting errors.  Part one may be read HERE
.
3. What to Expect at the Competition
Much of the anxiety you may feel, when attending your first few events, is caused by the fact that, “you just don’t know, how much you don’t know.”  This chapter gives you a look at what to expect during a competition and what’s expected of you.  Because many new XC pilots participate in weekend league meets, this type of event will be discussed first.

Weekend League Events
League events differ from larger competitions in that the number of participants is smaller and, even though they are more informal, your workload will be a bit higher to ensure that you are properly prepared for the event, logistically.

The league will have a website that is used to disseminate information, distribute waypoint files, and list pilot rosters.  You would do well to explore all areas of the website before attending your first weekend comp.  An example of excellent use of this medium is the Northern California XC League site.  You are provided with waypoint files and topographical maps, as well as Google Earth .KML files with points of information (lift sources, LZs, cautions, etc.)  Take the time to do your online registration and waiver, if this is an option.  Get as much done before the event as possible so you can concentrate on the task.

A lot of work goes into a site like that listed above – don’t be the guy who shows up at the last minute without the waypoints loaded, without maps, and without a clue.  Do your homework so you can get to the flying without being a distraction for other pilots.  Show up at the designated meeting place ON TIME.  When 25-30 pilots get together and wait for stragglers it has a tendency to blow the day, so we don’t wait.  If you are left behind, it creates logistic problems with your vehicle being stuck at launch, etc.  Be on time.

There are usually no dedicated retrieve drivers at League meets.  The system works because one or more pilots bomb out or land early in the task.  They get back to their cars early in the day and start retrieving others.  It is good form (and the only way a system like this works) for those pilots to do some early retrieve duty.  While on the subject of good form – when you are retrieved by someone, consider their time and fuel.  Compensate them reasonably and next time they will not hesitate before again driving into the boonies to pick you up.  Most big trucks get around 5 miles/buck (at $3.00/gal.) so a 50 mile drive to pick your butt up is at least a $10 ride.  Be generous and humble when recounting your epic flight to the guy who landed in the LZ two hours ago –
When you get back to your car, don’t drink that 2nd beer until you are sure that YOUR services are not needed to retrieve someone else.  GOOD FORM is important ;-)

OK, you have arrived at launch and you begin getting the lay of the land.  Find out when the site intro will be conducted.  Sort your gear and have it ready to go.  Eat something (you did bring a sandwich didn’t you?) and drink water.   Lurk, introduce yourself, learn who’s been here and get as much local beta as you can.  You are basically killing time until the pilot meeting.  Use this time wisely, and your day will be more relaxed and successful.

Pilot Meeting
At league meets the Pilot Meeting is very important.  All information, considered important enough to pass along to all pilots, will be discussed.  Don’t get yourself stuck next to a guy who wants to chat.  Bring a pen, paper, and your flight instruments and map to the briefing.  Information regarding rules, no-land fields, and safety will be discussed.  Information such as phone numbers and email addresses will be provided, which may become very important.

A ‘buddy system’ may be used to organize groups who keep an eye on each other at the end of the day.  Pilots with similar experience and performance, in groups of 3-5, will make sure all members of their buddy-group are down safe and accounted for with each other, and the meet director.

Task Briefing
Once all the administrative information has been covered, the Task Briefing will be done.  I recommend writing down the task on a piece of paper, or even better, a bit of tape on the blank spot of your GPS.  By writing down the task you aren’t distracted by the effort to input it into your GPS in a rush, and it is available for reference during the flight.  It is important to note the turnpoint cylinder diameters and start cylinder parameters on this task sheet.  Times, such as LAUNCH OPEN, LAUNCH CLOSE, START OPEN, START CLOSE, GOAL CLOSE, and REPORT BY TIMES are sometimes enforced.  Any frequencies and/or Phone #s given during the pilot meeting should be noted in your notes.   A weather briefing will be done.  Pay particular attention to afternoon valley winds and hazardous overdevelopment forecasts.  Once the pilot meeting is over you are free to input the route into your GPS.  If you have questions about the procedure, be considerate by NOT interrupting other pilots until they have completed their route setup.  Here’s my informal checklist for inputting and verifying a competition route:

1. Input all waypoints.
2. Verify the number of waypoints and total distance of the task are correct.
3. Verify (and input, if a GPS feature) all cylinder diameters.
4. Set up the start (If a GPS feature) and verify start diameter, EXIT or ENTRY START, and start time.
5. Activate route (if required).
6. Verify countdown timer (if GPS feature) is correct.

When you are satisfied that your electronics are set up you should verify the following, one last time:
1. Track log cleared.
2. Variometer audio ON.

Launch Queue Etiquette
Let’s talk a bit more about ‘good form.’  It’s often hot at the launch, and standing in the launch queue in full regalia isn’t comfortable.  It is, however, very bad form to get in the queue when not fully ready to launch.  You should have all harness buckles checked & double checked, gloves and helmet on and be ready to go.  I recommend launching early, but this is simply technique.  I figure that if indications are that it is possible to stay up, and conditions are favorable, it makes sense to get in the air before it blows out or the queue gets long.

Launching 30 to 45 minutes before the start allows you to launch before the majority of participants crowd the launch queue.  It also allows you to explore a bit and get a feel for the top-of-climb, wind, and develop a map of the start cylinder, so you can formulate a tactical plan for the start.

When new to comps, the launch can be a bit intimidating.  Launch only when you are ready and the cycles are right.  If you are lined up 2 or 3 abreast, announce your launch when about to pull-up.  DON’T get in a hurry and rush the launch.   If you don’t like the conditions at launch, there is no shame in stepping out of the queue.  Remember Rule #1  - Don’t make decisions that you wouldn’t make while free flying.   Your safety is your responsibility.

More to come -
Part four is HERE

Tim

Sunday, March 14, 2010

Flying in Paraglider Competitions - A Primer, Part 2

This is the second installment of an article I'm writing - Part one is HERE

Getting Started
Addressing the Prerequisites
You want to give it a try – but are you ready? You don’t have to be a sky-god to fly your first few comps – Just not a danger to yourself or others. You can build your list of skills gradually. Let’s go down the list and discuss how to develop some of the tools you should have in your aviation toolbox.

• Pilot Readiness. It is imperative that you are properly mentally prepared to fly in Paragliding Competitions. A beginner with Intermediate Syndrome and a gung-ho attitude is a little scary to watch – and dangerous to be. You need to talk with pilots who have flown comps and understand the game. You need experience at flying away from the local hill and the understanding that an XC flight should be conducted with the same level of safety and sense as that of a simple local flight.

You need to fly every flight with a commitment that you will not go places, or fly in conditions, that you wouldn’t while on a non-comp-local flight. Risk / Reward management is the primary skill that one needs to cultivate while building an aviation toolbox.

• Pilot Skills
 Assessing Weather conditions. The ability to assess the changing weather conditions while flying is essential. When you fly locally, don’t just be a follower. Try to understand how the local wx guru determines the forecasts and decides on likely flying spots. Look, also, at the weather on non-flyable days to develop a talent for seeing the hazards hidden in the forecast. Get to the site early and watch the conditions change. Note the visible hints and timeline of change vs. your forecast. All these skills will make you a safer and more tactical pilot.

Consistent Launches in variable conditions. Practice, Practice, PRACTICE. Mountain pilots don’t get to kite as much as coastal pilots, so the skills are different. Both groups should work hard to develop their weak skills. Know how to time your launch in a thermal cycle. Know how to control the wing in a stronger-than-anticipated gust. Ask – Practice.

Thermalling - in traffic. Thermalling is a dark art that many new pilots avoid. They worry about turbulence and bumps and collapses. Experience and airtime are the only cures for fear of the air. The sky is an ocean of air and thermals are an essential part of the ‘freedom’ of free-flight. Get good at thermalling and visualizing the lift. That said, thermalling with friends is a skill you will need to develop too. A gaggle is a busy place and, as a beginner, you need to fit in. You have to stay within your comfort level and get closer to other pilots with experience. The main mistakes a new pilot makes are:

o Turning in weak thermals. When you are new, the temptation is to take ANY lift available. That’s fine until you see a bird, trashbag, or other glider climbing faster than you are. If you see this you should move to that thermal. Learn to judge climb rates of others while you are in a thermal.

o Not turning tight enough. Keep your turn going. Let the gaggle guide the circle for a bit and just climb with the collective. When you are in a gaggle, it’s not your time to try to modify the circle. If you have pilots consistently cutting the turn, behind you, it means you need to tighten the turn.

o Not keeping a constant attitude while banking up. When you tighten your turn, keep a constant nose attitude so you don’t spiral down through the gaggle.

o Be Polite. Remember that this is one of many climbs today. You don’t need to ‘win’ this climb. Fly cooperatively and respectfully. Don’t try to stay out of the way, that almost always creates problems since now, you are not doing what they expect you to do. Try to be predictable and signal your intentions with body language.

o Enter like a PRO. You can make a name for yourself (not a good one) very quickly by entering a gaggle the wrong way. When approaching a gaggle you must look at it like a turnabout that you are merging with. Choose a gap in the parade and fly outside the turn, on a tangent, and slowly slip into the gaggle. There is no need to crowd or barge.

o Leave when the lift fades. There is little to be gained by staying with a thermal once the lift begins to fade. You will be in a better position staying with the gaggle. Assuming your altitude is close to that of the gaggle’s, when the gaggle rolls out on glide you should too.

Navigating. Practice with your GPS. I’ve set up waypoints at my local hills and built tasks to go through all the steps in flying a task. It is important to feel confident in your instrumentation and your ability to use it.

 Wing Control. Flying the wing simply has to be a secondary task. You must build the experience to keep the wing over your head even when flying in dynamic air. Don’t get in the habit of looking up at your wing every time you fly into turbulence. Sense your wing position as a bird does – through your body, hands, and sight.

Assessing LZs from the air and planning the approach and landing. Like all flights, XC flights come to an end. The landing plan must be begun while high enough to offer you options and a good view of the landscape. You should actually plan many approaches to landing as the day progresses in a normal flight. At 1500’ AGL I have a rough plan and a field or two that I keep in mind. At 1000’ AGL I make sure that at least one of my fields is adequate – That is:
o A size that is appropriate for the conditions and slope.
o Wind direction and speed.
o Wires
o Obstructions to the approach and rotor creation
o Wires
o Livestock in the field
o Extraction considerations.

o IMPORTANT – Look for a backup spot in case of; wind change, low altitude pop, etc. Nice to have a place to go when Plan ‘A’ doesn’t work.
It’s nice to work in a nice thermal trigger along the way to your LZ, so you are giving yourself an opportunity for a save while maneuvering to land. Strict discipline is important though. You should abandon all efforts for a save at an altitude (I won’t pick a number since it is conditional) and stick to that decision. Most pilots who get hurt, while landing out, start their stories off with something like, ‘’I was on base leg when I felt this great bit of lift off to my right. . .’’ While flying your approach to landing you must consider that you are tired, dehydrated, disappointed, and concentrate on the task at hand. Get down safe so you can fly tomorrow’s task.

While on the subject of landing out: Nobody looks good while throwing a tantrum or sulking. If you have a bad day, either go away to sulk alone or hang out with your buddies and regale in their success. Know that everybody has had a bad day. Fly enough events and you are surely to have a bad competition, where every task is a struggle and your results are dismal. Don’t get wrapped up in the results. You are doing this for fun and the pilots who have longevity in the sport never forget this – they are truly a treat to be around.

More to come in the next installment -

Part 3 is HERE.


Friday, April 3, 2009

Competitions This Season

Well the season schedule is beginning to solidify for the coming year. I'll be flying in the first round of the U.S. Nationals in Dunlap, CA (April 27th-May 2nd) and then heading North to the West Coast Championships at Woodrat Mtn. (May 31 - June 6th). Finally, I'll be flying the second round of the U.S. Nationals in Utah (Aug.16th - Aug. 22nd).

In between these competitions I'll be flying as many BAPA XC league and SoCal XC league events as I can.

I've been a bit frustrated for the last month because the weather and my UAL schedule have conspired to make it impossible to attend any of the league events, so far. I've been doing some virtual flying (reviewing my past flights at Woodrat and Dunlap) and reviewing my XC Competition Tips from PGForum.com compiled and Lessons Learned from my first few Comps.

I'm looking forward to seeing everybody at the hill. It's always good flying, a good group & good times.

Tim

Thursday, March 19, 2009

PodMod Pt. 2

A week ago I started my mod of my harness, by adding a pod. You can see Part One HERE. I've also made a few additional changes.
I've had a couple flights with my pod installed and really like the product so far. I am not totally satisfied with the mod, yet, though. I have encountered a couple problems.

1. The top (front) of the skirt has a lot of weight due to the front mounted reserve. This creates an issue when launching and groundhandling. When the risers are not under load, the pod skirt tends to fall forward over the carabiners. There is also a lot of stress on the seams where the carabiners support the pod.

2. When activating the speed bar (a 3-step UP ladder type) my heel tends to rub with much friction on the bottom surface of the pod. The XC2 has a very stiff push to activate the speed-bar already and the additional friction makes using the bar almost impossible and may cause wear of the pod.
Click on each photo for a larger view

To remedy the issues I added a strip of 1" webbing along the opening for the carabiners that crosses both seams to strengthen them.


I also added a strip of velcro that is wrapped around the carabiner and holds the skirt in place when the risers are not held vertical.


To fix my second issue I laid a 1/16" thick plastic cutting board, trimmed to shape, that fit between the piping at the floor seams. Sewn to the seams was a strip of 1" velcro, which holds the plastic in place, as well as physically capturing the plastic sheet.


Next I sewed a loop to the nosepiece which allows a 1/8" bungee to hold the stirrup in position for easy access.


Here's the completed stirrup set-up.

I'll be flying the new mods soon & hope to have a workable system before the first comp of the season.

Tim

Thursday, October 9, 2008

Recap of the '08 season

This year I chose to put some time & effort into attending as many paragliding competitions as I could work into my otherwise, fairly full life. My wife, Mary, has been very supportive & patient with my single-mindedness. I spent a lot of time flying to familiarize myself with my new wing, the Gradient AVAX XC2, a very nice wing with increased performance and a dream to fly. Rated EN-C, it is able to hold its own with most DHV 2/3 gliders. I also spent a lot of time reading everything I could get my hands on. My reading list included "Secrets of Champions", "Psyched to Win", "Deep Survival", and "Thermal Flying for PG & HG Pilots."

In addition, I compiled some Tips from Competition Pilots off the PG Forum that have given me much to think about. I also found a great resource online at John Cochrane's Glider page.


The results tell a tale -


In Jan '08 I went to Australia to fly the Killarney Classic where I flew my Aspen 2 to 39th place. The flying was primarily flatland flying which was very unfamiliar to me. I learned a lot & even though my results were dismal, I set a personal best of 71 miles when I made goal on the last task. This flying helped to prepare me for Chelan, later in the year.

In June I went to Ruch, Oregon to fly the West Coast Paragliding Championships where I made goal only once. I placed 29th overall and 11th in the Serial class. This was my first comp flying the Avax XC2 and had only 15 hours on it at that time.

In July I went to Chelan, WA for the Chelan XC Open - A pre-PWC event and the Canadian Nat's. There I flew three tasks and made goal on two of them. I placed 35th overall, and 7th in the Serial class.

In September I went to Bishop, CA to fly the 2008 U.S. Nationals. I love flying in the Owens Valley & had a good competition, although we only flew two tasks. One task, of over 100k. had me on final glide with the lead gaggle - placing 15th & only a couple minutes out of the leaders. I placed 22nd overall and 7th in the Serial Class. I also had one of my all-time best flights, on the practice day, from Walt's launch on the Sierra side of the valley. I flew, mostly alone, for 64 miles along the high Sierra to Bishop with wonderful views along the way.

I've had good results in the Northern CA XC League. My Avax XC2 is an EN-C rated wing which put me in the "Cat 2" group. This year I placed 5th overall (behind very good pilots on competition wings) and 1st in my category, ahead of all other DHV2/3 and DHV2 wings. Most of all, I had a great time flying with the BAPA pilots that regularly make these events. I have learned a lot from Josh, Eric & Eric, as well as many other pilots who have flown these events. I've also made an effort to help other pilots who are getting familiar with their equipment and the rigors of XC competition.

The tale, that I think is indicated by the results, is that the more I fly, the more proficient and consistent my flying becomes. I flew my Avax XC2 over 1,500km. (930 miles) in 33 flights - My comfort with the whole comp preparation and planning has also increased during this season.

I'm really looking forward to next year. The US schedule isn't out yet but I will, again, try to fly many comps to improve my flying skills and achieve consistent results..

Fly a lot - fly safe.

Tim